Sunday, November 17, 2013

Terraforming Necromunda

Remember these? I think I was actually hooked by GW's card terrain back in 1998 or so, when I saw the Imperial Firebase kit. I wasn't even playing 40k yet, but this kit had potential. I mostly forgot about it until I got into the hobby, but by then they were largely out of circulation.

Fast forward to last week or so, and I scored a massive bundle of Necromunda bulkheads and the card that goes with it. Now that terrain is great fun, but not super durable. The eBay auction I won indeed showcases what happens when your card terrain is much loved and hard-used. What to do, then?

Build em better, that's what.

I started with a sheet of .25 foamcore and some of the card levels I want to produce. I traced the sections onto the card and then cut them out, leaving me with this:
You can see on the cut sections where I marked out the slot lines. The biggest challenge in this project is to retain the modular nature offered by the card terrain. I have some ideas about how to best this challenge.

Closing, I'd like to once again plug Terragenesis, and thank the creator Gary James for putting it together in the first place; as well as thanking Andy Slater for keeping it up all these years. The community is amazing over there, and very supportive of all comers. This project was inspired by one of their monthly competitions. I encourage anyone interested in wargames terrain production to check it out.

Cheers,
-Xi

Thursday, October 24, 2013

Forgeworld Updates and You!

Or more specifically, Forgeworld's latest PDF releases and what it does to my list. Armenneus Valthex is still the same price, points wise, but his warlord traits and bonuses only count for units with Chapter Tactics: Astral Claws. I'll go back to using a generic Master of the Forge with conversion beamer now, and keep using Chapter Tactics: Iron Hands.

In case you might have missed the Forgeworld updates, they are here:

http://www.forgeworld.co.uk/Downloads/Product/PDF/C/Charcterupdate.pdf

http://www.forgeworld.co.uk/Downloads/Product/PDF/F/FWchaptertactics.pdf

Cheers.

Friday, October 11, 2013

Adeptus Mechanicus Devastators

So I happened upon these models on eBay and at a glance they seemed uniquely suited to my purposes. I snatched them up and what a deal, I must say. All of the Space Marines have the driver chest piece with the cog sigil, as well as the Mechanicus shoulder pads. When the models arrived, I was pleasantly surprised to see that all the bolter marines had SM Scout Biker combi-bolters. The close combat marines had a variety of bits, including two of the old Blood Angels Honour Guard tech-axes, two each of Space Wolves power axes and swords.

Now unfortunately, these guys were assembled poorly and pained sloppily. Worse, even though they all sport the cog shoulder pad it is on the wrong side of the model. I carefully snapped all the arms off of the figures. They had quite a few layers of paint that a brake fluid bath took care of nicely. Once they came out, there were blobs of superglue revealed everywhere.

I did my best to scrape it out where I could.

Meanwhile, having this lot of marines arrive meant that the time had arrived to get some more heavy weapons, in the form of a SM Devastator box. I really can't say too much more to sell it than eight heavy weapon options. I've started out with the heavy bolters, since my first ever 40k figure was one of the 3rd edition versions of the same.

The challenge that the heavy weapons present is that they all have shoulder pads moulded as part of the sculpt. They also happen to be in the same wrong place for my amry... time to break out the razor saw.
It took a bit of doing, but I managed to get the pads replaced on the heavy bolters. The first taught me quite a bit about how to screw it up, but some greenstuff will fix that. The second went much smoother. Seen here as well are the bits for a missile launcher Devastator. I have a second set prepped somewhere. These were much more straight forward to convert once the moulded in shoulder pad was removed, just insert cog pad and viola. The rest all sit against the weapon or the power cables. I say its all worth the work in the long run.

Cheers,
Xi

Wednesday, October 2, 2013

90 Minute Time Limit Not Enough?

This post is in response to another I spied over on 40k War Zone. I had originally intended it to be a comment reply to their blog post, but it just sort of sprawled.

I think that 90 minutes is plenty of time to complete a tournament game. The thing about a tournament is that if you are playing here, you ought to have some idea of what goes where.

Organizers should have briefing time built into their schedules between games, to go over the scenario and answer questions related to them. Tables should be set up before hand, and not dicked with by players. Organizers should be clear beforehand about rules and rulings. Informing your players which rules will be allowed and that disputes will be read Rules as Written, so don't bother to argue and whine, thank you. A tourney organizer should never run an event alone, this guarantees shenanigans. They should instead appoint referees who can also field disputes and just keep an eye on things. When a game round ends, and a match is only 3 1/2 turns in, there is a problem.

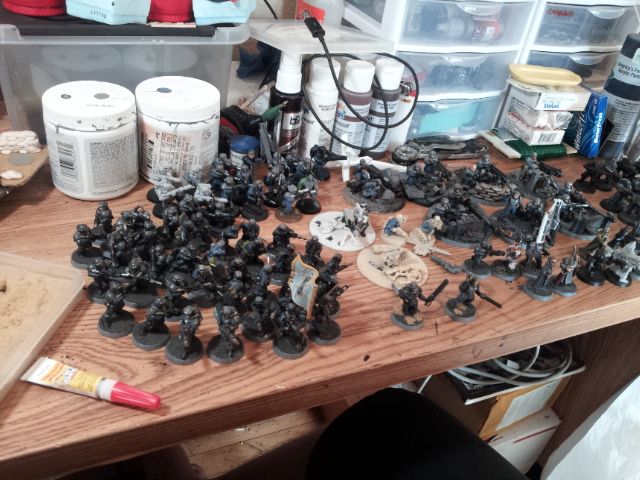
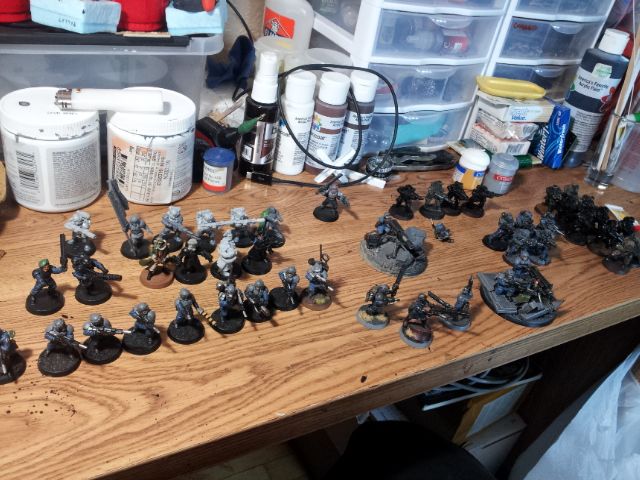
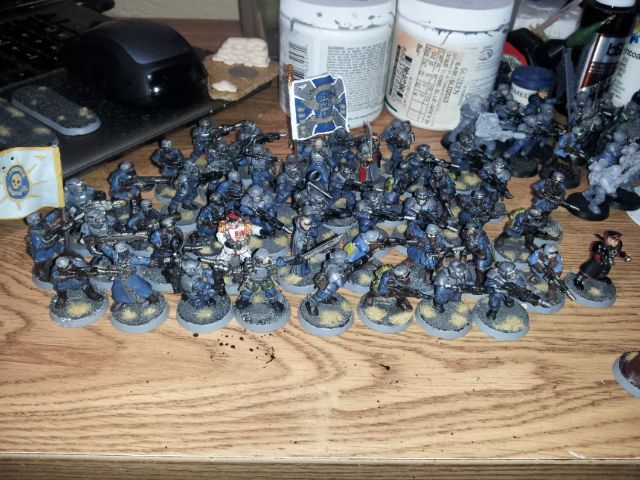
Players should have their army lists ready when they arrive, and exchange them during the briefing period between games. They should also be able to deploy their army in a timely manner. Any follower of mine can tell you that my army of choice is the Imperial Guard. Of late, I am taking an IG force of nearly all infantry. My 1500 point list is something like 100 models, and I can get 'em all out of my army bag and onto a lunch tray for pre-deployment with ease. I reset units between games, and deployment, while not always artful, is quick.

Players who come unprepared don't get to play, period.

The first tournaments I attended, I placed poorly. In fact, in my 40k career I haven't had any tournament wins. I do always have fun, though. These tournaments had scoring based on performance, as well as army comp and painting. You didn't have to be the best painter to score a quick five points, either. There was usually about 20 guys turning out, to play three games. There was first, second, and third, as well as best painted and sportsmanship awards. Of course, Games Workshop used to maintain Outriders to run the tourney circuit, and offer prize support as well. We had pizza more often than not, and hearing '4,5, or 6 it' to settle something was the rule more than the exception. 90 minute rounds were what we played, and usually with 2500 points.
/rant

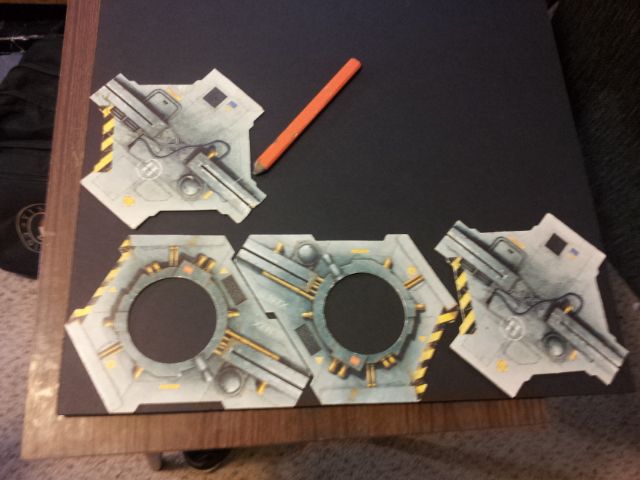
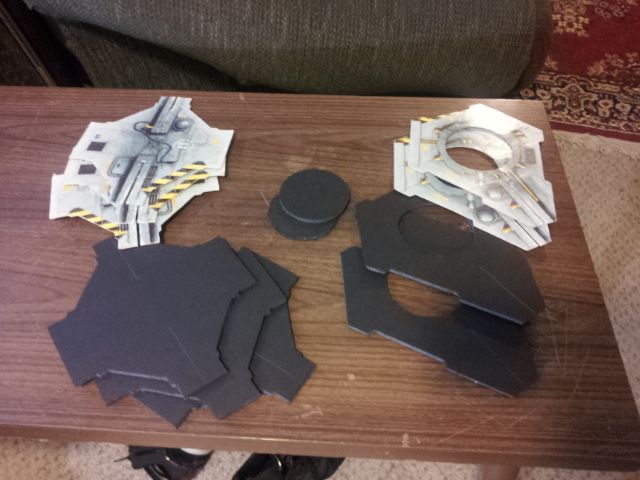
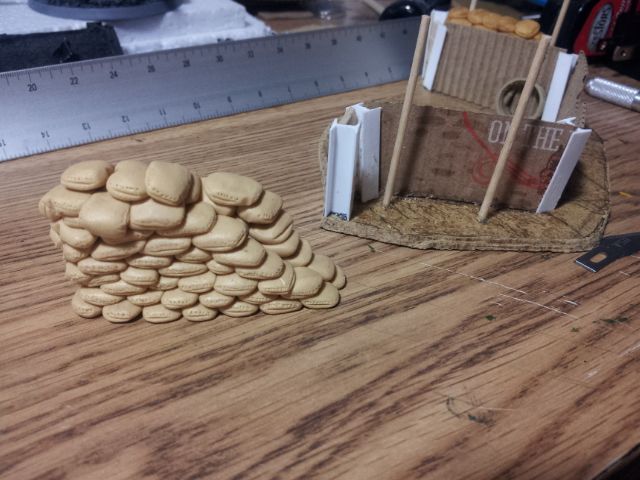
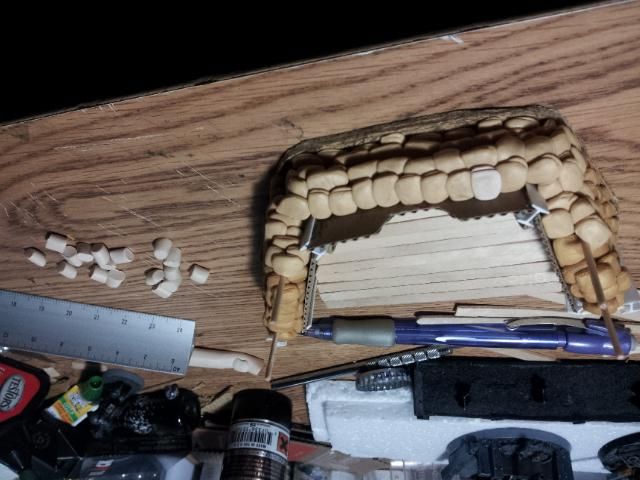
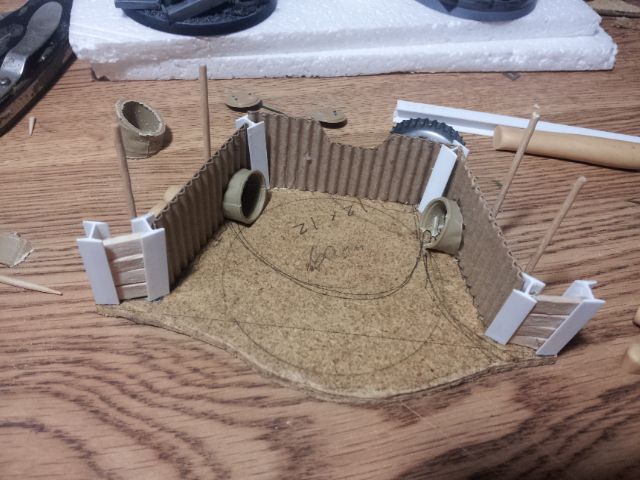
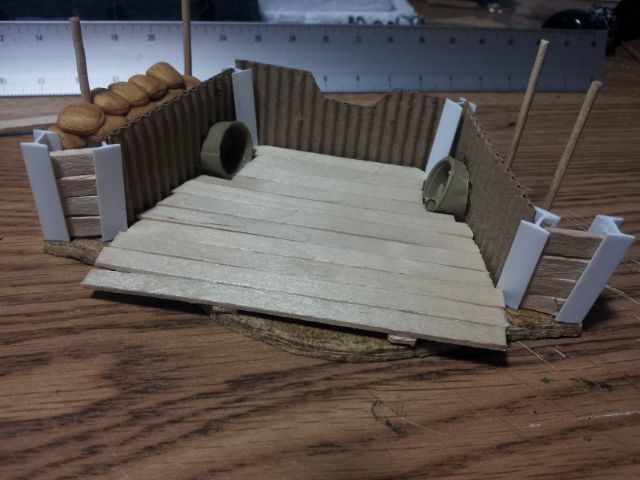
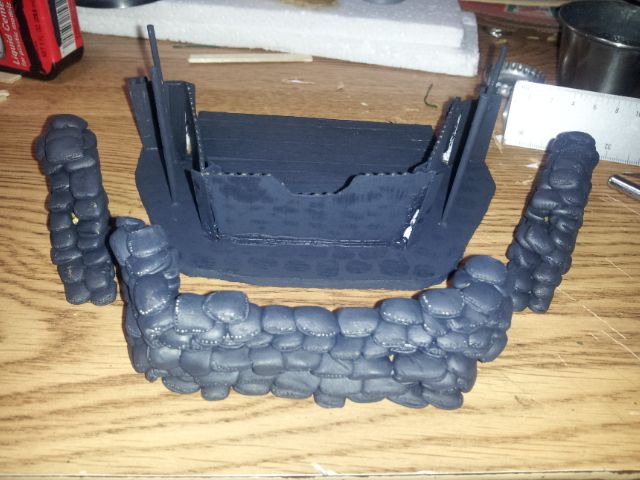
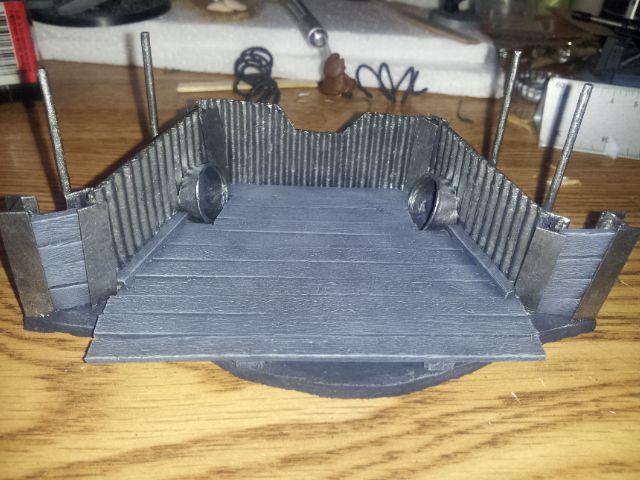
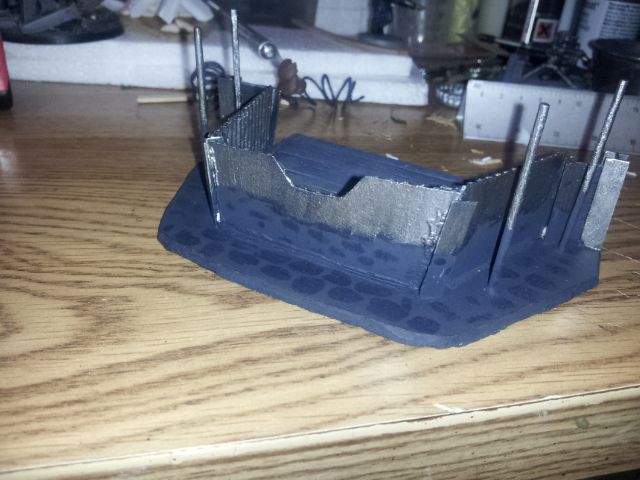
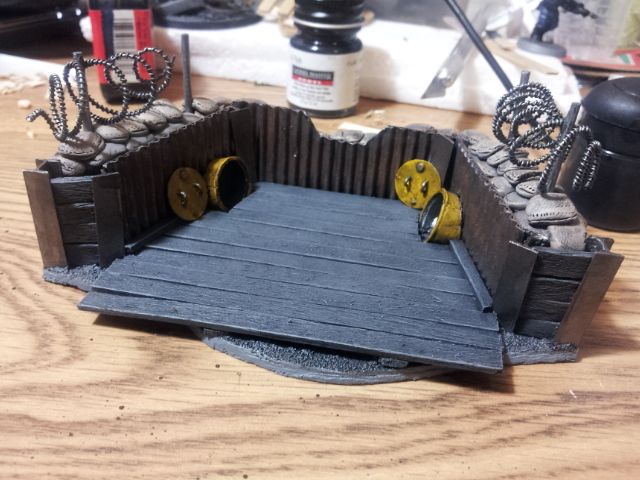
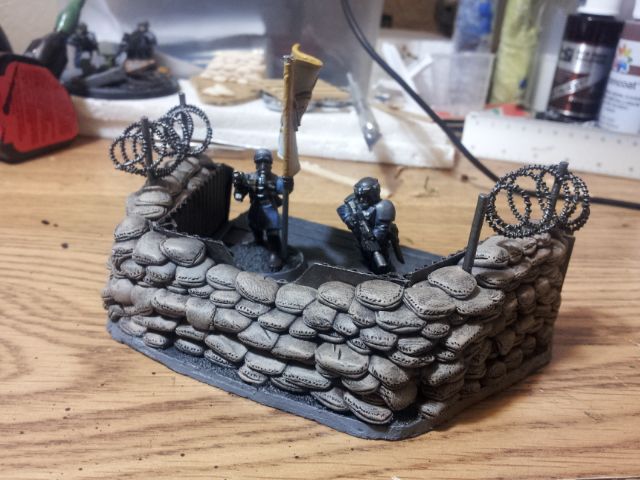
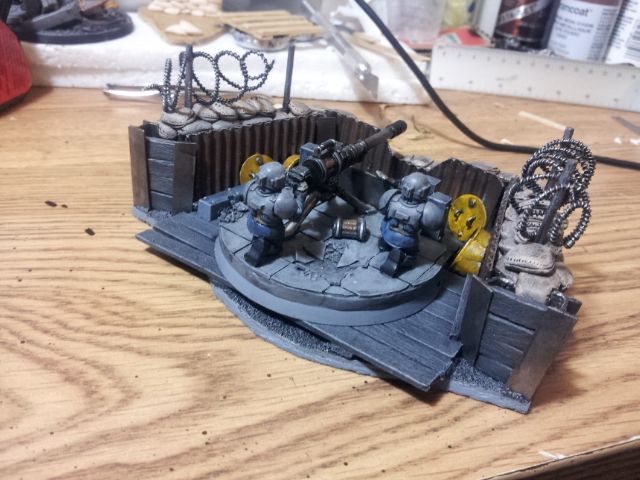
In other news, I've been building some terrain after spending most of September not accomplishing anything. Somehow, I was moving for the whole month even though the actual move took a day... someone will have to explain how exactly that works sometime.

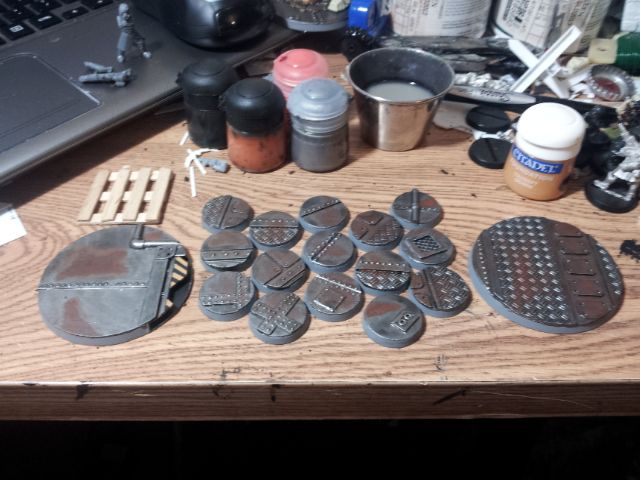
I've got a pile of new stuff to work on, due to some killer eBay gets, so stay tuned for that.

Steve over at Mad Robot is working the Kurgan Winter Guard now, and I have a platoon of guardsmen waiting for when the greatcoats are released. I haven't quite decided what to do with them, either a third platoon for my existing forces or more 'counts as' Mechanicus, maybe Inquisitorial henchmen this time around. Time and finances shall tell.

Until next time,
Xi

Sunday, September 1, 2013

September Update


Just a brief shot to show where I'm at.

Going into September, I have completed the first squad of Techmarines for my Adeptus Mechanicus themed Space Marine force. I have also finished my first ever Contemptor pattern Dreadnought. The next step is to take some decent pictures of the completed squad and their custom bases so I can show off.

I mean, you do deserve better pictures than these.

I have also finished making moulds for the aforementioned custom bases, and a related post is forthcoming.

Next on the workbench is another unit of Techmarines. I've already began assembly.
With what I learned from the last squad, assembly of servo-arms should be easier, and construction smoother.

Cheers,
Xi

Tuesday, August 20, 2013

Adeptus Mechanicus 003

I finally got the servo-arms settled for the first squad of Techmarines. Now that they are complete, I am able to move on to painting them. I started with a basecoat of Testors Flat Black, and then a coat of Mechrite Red.

Once that dried I applied a drybrush of Red Gore, then Blood Red, and topped it off with a wash of Devlan Mud.

After the Devlan Mud dried, I went back with the drybrush and added a layer of Blood Red, followed by Blazing Orange, and another wash; this time it was Baal Red.

Once the red was completed, I painted all the metallic bits with Gunmetal Metal, and then gave them a wash of black.

They really look like Word Bearers at first glance (to me, anyway), and make me want to get moving on a CSM army (again).

C&C welcome,
Cheers!

-Xi

Tuesday, August 13, 2013

Adeptus Mechanicus 002

I've been working on my Space Marine allies lately, making bases and constructing servo-arms.  I've also been getting my Contemptor ready for paint.

First, I finished the task of magnetizing the close combat arm.  Then I added cog tooth embellishments to the shoulders using .030x.060 sheet styrene.  I plan to add the same detail to the knee pads.

I've also put together a bunch of servo-arms.  With each one I build, the next becomes easier and a bit more ambitious.  I'm working hard at making sure they have that Mechanicus feel, as well as not being too oversized for the models.  I use a selection of sheet styrene from Evergreen that includes .030x.060, .060x.120, .0625dia rod, .125dia tube, and .1875dia rod.  The power cables are made in my usual fashion, wrapping floral wire.


Some of my sergeants will have a full servo harness.  I've since completed this one, stay tuned for the finished product.

Remember this base?  I really liked it at the time when I produced it, but the more I thought about it, the more I realized it wouldn't fit with my other bases I've been building for this force...
...so I had to make a new one.
Much better.  I'll keep the old one for a Heavy Weapon Team or a Sentinel.

Cheers,
Xi

Thursday, August 8, 2013

Tidying Up the Imperial Guard

Here is my Imperial Guard force.  Tidying them up involves finishing units, finishing the little details, and basing the force coherently.  Laying everything out like this lets me see what I need to complete.

Basing is one of the things that can make or break an otherwise well painted army.  We've all seen it: some one in the FLGS with an army that has been growing for years, and the bases show the evolution of their vision.  Hell, even I did it with my first Space Marine army.

With my Imperial Guard force, I decided on urban style bases, as showcased in the Azog Treadbike project.  My army has been mostly painted and for a while, but some models still needed their bases finished.  The bases I'm using include some Epicast bases and some custom bases I produced.  The rest just get the usual treatment of sand and dead grass.

From the above blob, I separated these models out as needing completion in some form or another.  For now I'm concentrating on the bases.  Most of the models just needed a daub of glue and a bit of static grass.  These immediately above needed a bit more work... not including the wholly unpainted command section there.

I started by using PVA glue to attach sand to all the bases that needed it.  Then I waited for it to dry and did some work on my Storm Troopers.  Once the bases were ready ready for paint, I quickly added their first layers of flat black, then codex grey, and a wash of black.  Then back to the Storm Troopers until that dried.  Once the wash dried, the bases were drybrushed with codex grey, fortress grey, and finally kommndo khaki.  They were finished up with static grass.

Here is most of the lot.  I'll have to post a picture of the army in rank and file.  I'm thinking of picking up a Sack o' Skulls from Secret Weapon Miniatures and sprinkling them out across the bases for some more colour.

Here are the bases I plan to use for my Mechanicus Marine force.  I plan to pour a mould and make casts of these.  I'll make sure to post the results.

Cheers,
Xi

Wednesday, July 31, 2013

Adeptus Mechanicus Update

I've been working on a few things since I finished the Azogs, mostly basing my army.  I've also been working on building servo arms for my Ad Mech Space Marines.  Here is a shot of the three marines that I've painted so far.

Thursday, July 25, 2013

Terrain: Heavy Gun Nest 002

With the base all set, its time to add sandbags.  I use Sculpey polymer clay for my sandbags, rolling it into a 1/4" dia. sausage and then cutting it into roughly 3/8" lengths.  Once cut, I shape the segments and place them.

It is a time consuming task, but the results are worth it.  I built up the sandbags in three sections, baking each separately.  


The pictures are a bit out of sequence since I ran out of Sculpey while working on the front section of the sandbags.  The grenade sumps are made from a Tamiya 1/35th scale barrel.  After the barrel ends were installed, I put down some duck board, using coffee stirrers.

Everything got coated with Delta black, and then base colours and initial drybrushing.  The metal parts were all painted with Game Colour Gunmetal Metal.  The decking and wood retaining walls were painted with Codex Grey and then drybrushed with Fortress Grey.  The sandbags were painted with Delta Brown Iron Oxide, then overbrushed with Graveyard Earth and Kommando Khaki.  Finally, everything was given a healthy black ink wash. The last picture up there shows some spots in the black basecoat; these are from the uncured sandbags sitting there.  That's right, Sculpey sweats; so beware.  Those little spots haven't bothered me before, but your mileage may vary.

I weathered the corrugated metal by stippling using Delta Burnt Umber and Delta Brown Iron Oxide.  Once that dried, I gave it a drybrush of Gunmetal Metal.  The grenade sumps were painted with Tausept Ochre, then Golden Yellow.  The sandbags were finished with another heavy drybrush of Kommando Khaki. The few spots with sand on the base is Citadel Astrogranite textured paint.  This stuff has its uses, even if it is a pain to get out of the pot.

The completed gun nest.  It fits the 60mm base comfortably.

Cheers,
Xi