Monday, May 16, 2016

Gideon MBT 003: Assembly Complete

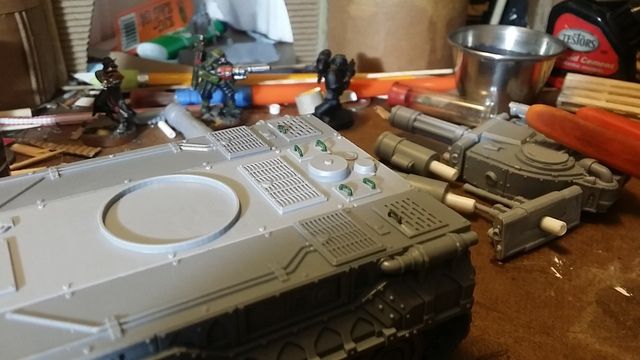
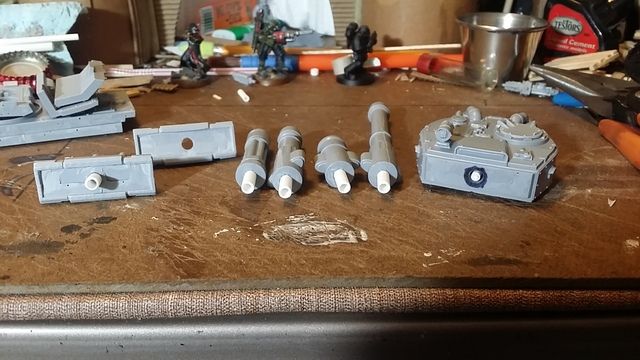
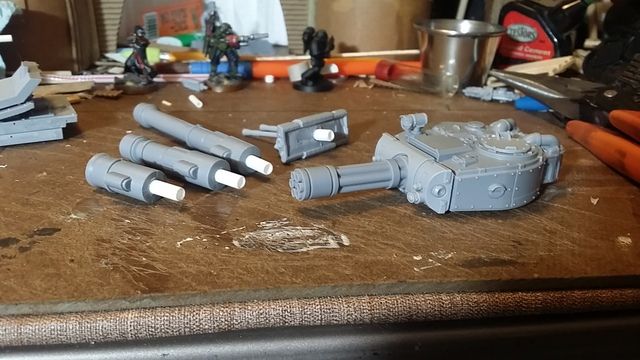
Once I finished getting the turret modified, I set to cleaning up all the resin gates and mould lines on the parts.There are a couple that will require filler to get settled properly, but that's no problem, ya?

Right. This build has me excited. I keep saying it and it keeps being true XD

After I had all the pieces trimmed and ready, I gave them a dry fit to make sure all the lines were straight and joints flush. All the parts fit nicely.

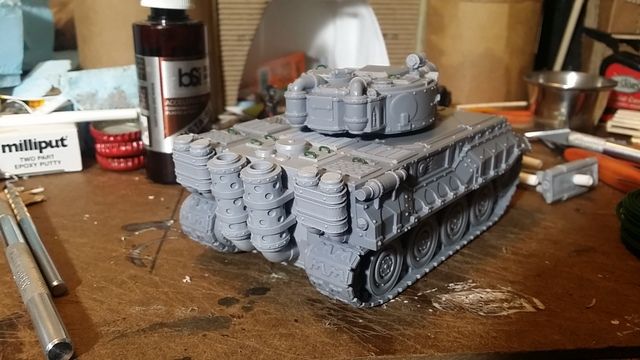
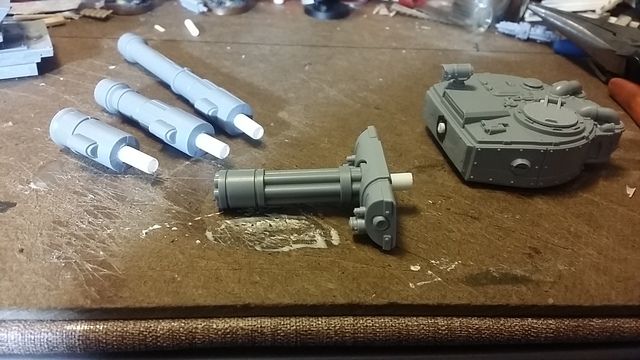
The next step was to give everything a scrub in warm soapy water. I use mild dish soap and a soft toothbrush. After scrubbing the pieces are rinsed, bathed in clean water, and finally set out on paper towels to dry. Once everything was dry I set to work getting it assembled. The major converting on the turret weapons before washing the parts so that I could wash off the residue of the super glue accelerant I use.

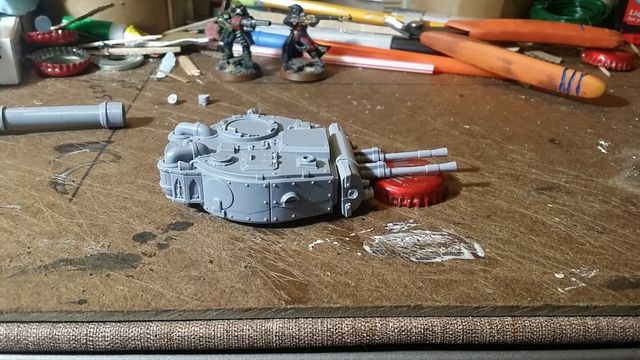
First I built the box of the main hull, then glued each side in place. Exhausts, intakes, and hull mounted heavy bolter quickly followed. I clipped all the resin handles off and replaced them with handles made of floral wire. I did the same for the handles on the turret.

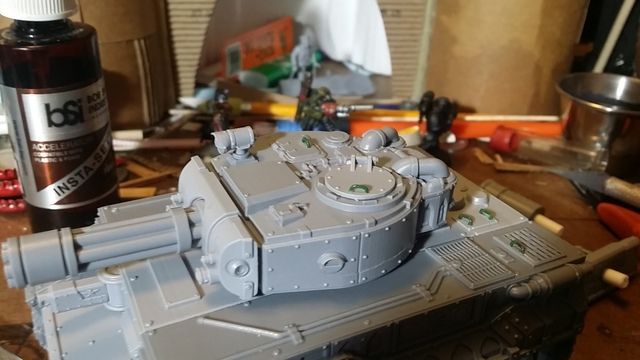
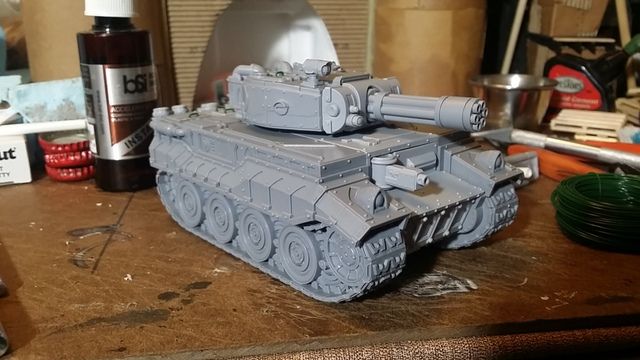
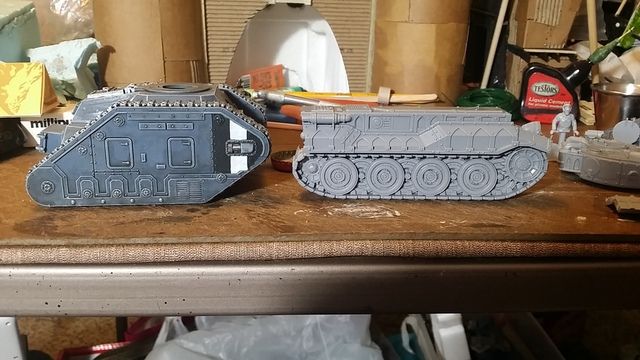
And here she is. One of the first twenty hulls to roll off the line at the Mad Robot's forge.

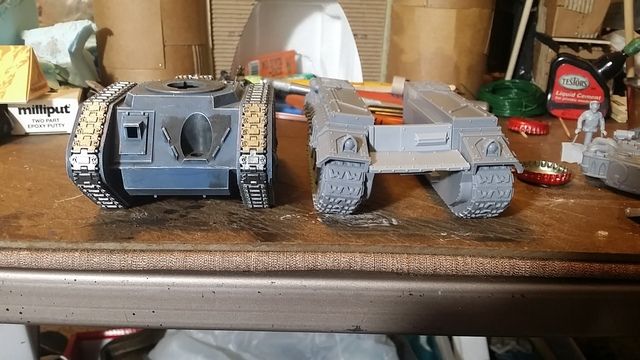
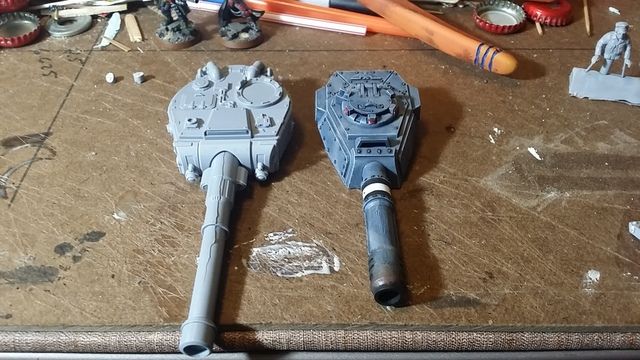
Here are a couple more comparison shots with the Leman Russ. The Gideon is longer, but both tanks are about the same width.

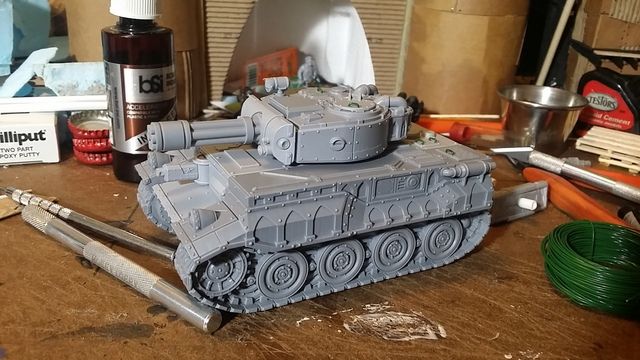
Now one thing that isn't included with this kit are side sponsons. That's fine, they are a point sink anymore if you ask the internet... :P I happen to like em for the aesthetic if nothing else. Having all these variants though makes me think that a pair of heavy bolter sponsons wouldn't be amiss to pair with the gatling cannon or the autocannons. What self respecting guardsman has ever bitched about having more dakka to point at the Enemies of Mankind?

So stay tuned for paint, for sure. On the maybe list is a dozer blade and heavy bolter sponsons.

Cheers,

CJ

Saturday, May 14, 2016

Paint Table Saturday: Workbench Update

Greetings! It has been too long since I've had anything to share here.

As one might guess, I've been working steadily on my Gideon from Mad Robot. The turret has been modified to accept all the weapon options included in the kit. Before that excellent tank arrived I was working on my underhive terrain and the scrap pile.

The piece has been given a black basecoat and should be finished soon.

And that is all I've been doing this week. Next week I want to have the Gideon properly assembled, gaps filled, and details handled so that I can get on with painting it.

Cheers!

CJ

Friday, May 13, 2016

Gideon MBT 002: Weaponizing

With five different main armaments to chose from, the Gideon can fill any roll you might need it for, With a little hobby savvy, I decided to have it all.

I originally thought magnets for my Gideon, and I may still end up adding a couple down the line. For now, I decided on a male female connector using styrene tube and rod.

I tried to take a photo while I was doing the converting on the turret, but really... it's a series of holes. So I drew out a cutaway.

First thing I did was drill a 1/16" pilot hole in the center of the gun mantlet. From this hole I lined up the four barrels and drilled pilots into each one. Then I centered the mantlet on the turret and drilled another pilot. For the autocannons, I placed the gun mantlets back to back and drilled the pilot. The pilot holes were all bored out to 3/16". On the turret I then drilled in deeper with a 1/8" bit, then deeper again with the 1/16" bit.

I fit each barrel with a 3/16" piece of styrene tube and super glued them in place. This made my male connectors. For the female connector in the turret, I used a piece of 1/8" tube with 1/16" rod inside. In the diagram above you can see how I used the rod to anchor the tube... well that and more super glue. Friction serves to hold the barrel of choice in place with the mantlet.

Next up is the assembly of the main hull.

Cheers,

CJ

Thursday, May 12, 2016

Gideon Main Battle Tank 001: Unboxing

This magnificent beauty arrived today. Fresh from Mad Robot Miniatures, the Gideon MBT is a great replacement for the Leman Russ. I like the lines of this tank, originally designed by Jas Hodge. The Mad Robot turned that 3d model into this gorgeous chunk of resin. I made an unboxing video to show off my new tank. I can't wait to get two more and have a squadron.

If it only plays at potato quality go to youtube and watch.

There is the hull compared to its countpart. The tracks look a lot beefier (better) and the head lamps built in the track guards are great. The sides are nice, solid sections. One bonus to this kit for me is that if I want to add side skirts there is plenty of room to do so. Same with adding sponsons if I decide I want to waste points :/

You can see here how the turret is also quite a bit beefier. I've got the long barrel canon out to compare since I have my assembled Leman Russ with a Vanquisher cannon. The barrel is nice and long like the Forge World offering. The last picture is the twin autocannons to count as the Exterminator. I plan on using magnets to be able to mount all five options included with my Gideon.

...I haven't gotten a tank from Forge World in some time but I don't remember any of them being this clean.

Cheers!

CJ

Wednesday, May 11, 2016

Now and Then: Leman Russ

Sometime around October I picked up a Leman Russ to make a command tank. I'll post some shots of that in a later post.

In March I won an auction on eBay for another Leman Russ. A Second Edition Leman Russ.

The box now is two halves, so was the 2nd Ed box. The instruction pamphlet is pretty straight forward for each version of the kit as well. Big differences in the contents are that the current release doesn't include road wheels or the Imperial vehicle accessory sprue (the first one, with the extra pointy dozer blade).

Another big difference is the original kit only made one Leman Russ variant. If you wanted a Demolisher you needed to buy that kit, and there was an Exterminator kit. Only heavy bolter sponsons, only hull lascannon. The aforementioned accessory sprue came with one heavy flamer.

This is my favorite part of the old kit is the rules. I've seen an entire armoured column destroyed due to just really, magically shitty rolls on that chart.

Sometime soon there will be a post with some tanks being taken from the Pile of Grey Shame instead of added, I promise.

Cheers,

CJ

Sunday, May 8, 2016

Terrain: Scrap Pile 001

I decided I needed to get something done while working on the bigger pieces I have on my table at the moment or lose all momentum and stagnate for another month or three...

I chose a scrap pile as a quick project. I've wanted to throw one together for a while now; and after seeing one on the commute to work every day I was inspired.

I started with a hardboard base, half of an empty welding wire spool, and some styrofoam. From there I added cut up pieces of thin card and broken pieces of stir sticks. I started at the bottom and layered around the piece moving up. Pieces of steel in a heap will auto level after a fashion. On one side of the pile I cheated in the effect of many, many layers of sandwiched plates of scrap by scoring lines in the foam then wedging pieces of card in. Once its all painted I'm hoping the effect comes out right.

After the glue holding the card in place had set I added filler to the side of the spool. Once it had dried I added a couple more plates to that side then gave the base edge a layer sand.

This piece is a companion of sorts for the Mek's Workshop I started last summer. What self respecting Mek doesn't have a handy scrap heap?

I can say that this little piece coming together so nicely after sort of struggling with motivation on the two larger pieces is really what I needed, and I'm ready to get cracking on the bigger pieces again.

Stay tuned for more terrain updates.

Cheers,

CJ

Tuesday, May 3, 2016