Showing posts with label WIP. Show all posts

Tuesday, April 17, 2018

Thunderer Siege Tank 001


One of my favorite thing to do is convert models. If you've been following my blog for any length of time I think this is pretty clear. For #armourinapril I decided I wanted to add another hull to my collection so I turned to the Pile of Grey Shame to see about parts.

 What a shock I found everything I need... As you can see I already made some cuts to the main hull pieces of the Leman Russ and the Chimera.


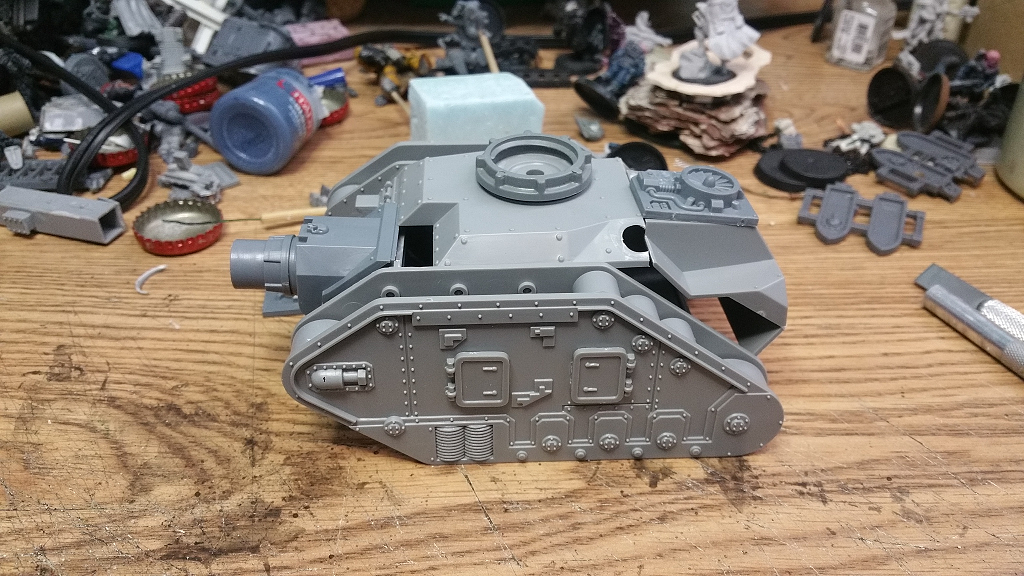
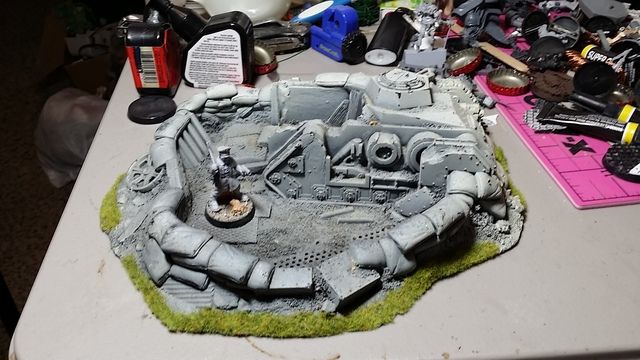
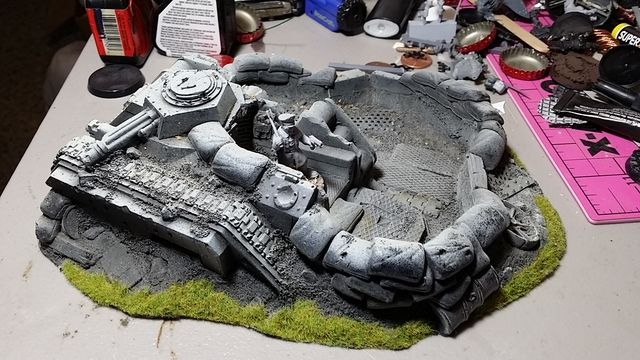
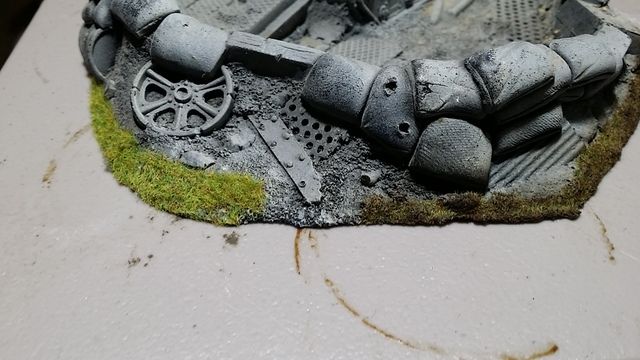
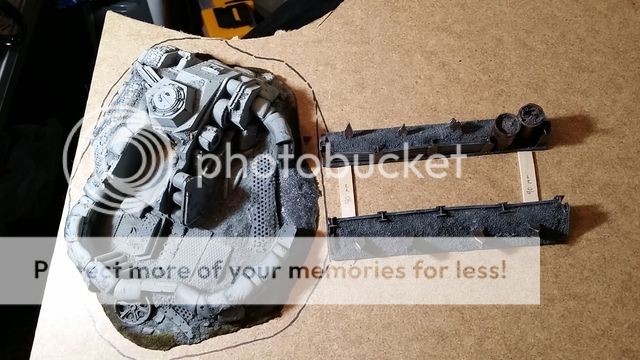
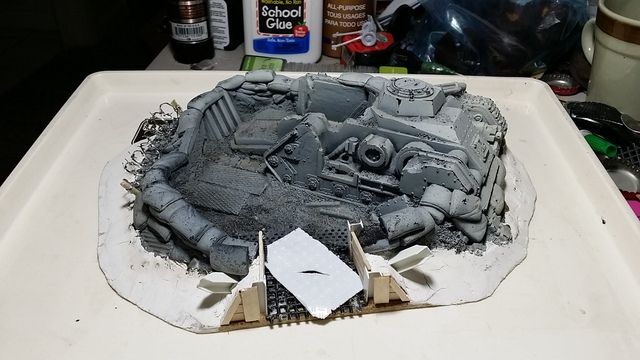
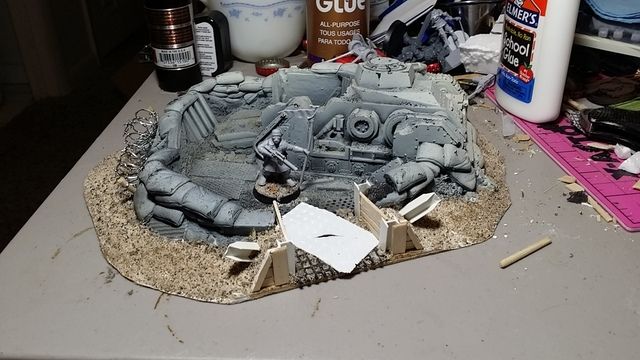
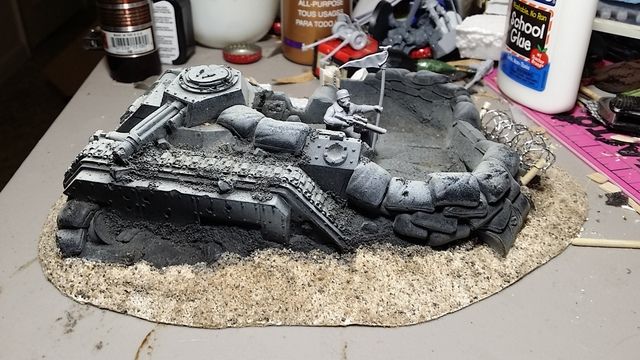
And after a few hours of work and the addition of some greebles I have a very serviceable Thunderer Siege Tank. There is still a bit of work to do (like adding rivets) before I set to with the greenstuff to finish the build portion of the project.

Now at first I was worried about getting the 'Convert a model into a totally different unit or character. Make sure it accurately represents what it's supposed to be' stamp. I was thinking characters and models on foot and really I'm pretty well set for characters. No, that's a lie... I've got more characters than I need. But then I dug into this project and realized it was perfect to tick it off for my ninth stamp. Still no bingo!

I guess I need to keep plugging away at the pile.

Cheers!

CJ

Tuesday, March 27, 2018

Gaslands 001: My First Ride!

So I have heard good things about this game around the internet. I'd like to get my hands on a set of rules and maybe even find some opponents... but before all that I decided to convert myself up a car.

 This is a little Radio Shack remote control car that was floating around the house. The charger and controller are long gone so I gutted it and set to work with some of the styrene stock I had.


And a couple hours later this is what I ended up with. The tanks in the back are from the Chemical Plant sprue, as is the silver scoop on the hood. I'm very pleased with my first go at this stuff. I want to find some more cars and see about just making some fun Mad Max style vehicles, maybe a whole fleet.

Cheers!

CJ

Saturday, March 17, 2018

Paint Table Saturday

It's assembly table Saturday this week. I took a trip over to the new Warhammer store in Layton to check it out and ended up leaving with Gang War II and the Orlock box set.

First thing I decide to do was convert an Orlock leader with a meltagun and an eye patch.
Happy St. Patricks!

Cheers,

CJ

Saturday, February 10, 2018

Paint Table Saturday

Been a while since I had anything to show on my Paint Table Saturday update.

Here is the state of my Squaduary pledge. The Primaris Marines from Dark Imperium have been a lot of fun to work on so far. Hopefully today I'll get the rest of the base colours blocked in and these minis will be ready for detailing. I also plan to get some work done on some custom bases for the models.

Cheers!

CJ

Friday, February 9, 2018

Squaduary Week 1.5 Update

Alright first week and a half of Squaduary is past and I have plenty to show for it!

I've got my Primaris Ancient and five Primaris Intercessors painted up and ready to go. The rest of the Primaris Marines from Dark Imperium are almost all primed and shaded up, and I've already started blocking in colours on the next five Intercessors.

I'll have a proper for the end of Week 2.

Cheers,

CJ

Monday, June 5, 2017

Imperial Space Marine 001


A little over a year ago I ventured out to secure my little plastic piece of 40k history. Huzzah!

Well I finally got him put together this past weekend.

This, like all the other one sprue GW models I've seen, went together with ease.

For the base I went with some resin embellishments from the 40k Basing Kit. You can still find these on eBay (if you're willing to pay for em). I got two over the last six months and not too pricey so I lucked out.

This guy will be painted up as an Iron Hands Astartes. I sort of have an idea of how to ruin this perfectly good model to make it a bit more thematically appropriate for the marines of the X Legion.

Cheers,

CJ

Sunday, May 21, 2017

Terrain: Sewers 002

The sections for my sewer are largely ready for paint and I decided to try something new instead of the usual PVA, paint, and water.
This stuff is pretty good. Your mileage may vary but I got all the main pieces of my sewers triple coated with spray primer. I think with extruded styrofoam sheets it will work better. The expanded polystyrene just has too much exposed area to do any less...
This is my fault. I gave this piece two coats of primer and didn't give it time to dry properly before giving it a coat of black. You can see I ended up getting a cool looking texture for my efforts. Seeing this patterning was enough to make me slow down and give the other pieces time to dry properly.
Overall I like this foam primer. I'll probably keep using it in the future since I have quite a few projects planned to use all this foam I've accumulated.

Cheers,

CJ

Tuesday, May 16, 2017

Terrain: Sewers 001

Remember this from a couple weeks ago? Well most of it is still there but in different shapes. I've been at it with a big knife forming interesting sewer-ish shapes.

Here's the first one just about ready for some paint. I've used some scrap wire to make the cables attached to the wall, and flexi-straws to make the pipes. ½" metal cloth mesh I scavenged from somewhere or other is what I used for the guard rail, and thin card on the back side. This piece will sit on a 24" tile, one of the corners. All styrofoam pieces on the edges will be clad in cardboard to help protect it. The ladder is from the Cities of Death extras frame.

I don't plan an overly complicated sewer, and hopefully this will help me to finish this project in a timely manner... yeah right.

Cheers!

CJ

Saturday, March 25, 2017

Planetary Empires 001: Hive Primus

I've been splurging on eBay for this and that lately, like the Chimera Bunker. The latest has been both the Mighty Empires and Planetary Empires sets, including the hive city tile and the wizards tower. The Mighty Empires set I really don't have a plan for too much past using the tiles to supplement my Planetary Empires set... and the plan there is to build a world (maybe more) for all my little plastic men to have adventures on. The first step in the plan is of course the Hive Primus for the world as yet unidentified.

I had an idea while I was clipping out tiles and putting things together. It struck me as an idea worth exploring for my Hive Primus.

I started by thinking about my project and hacking up these mountain tiles, then gluing them together. Next I set to cutting out the hive from the rest of its tile. It took quite a while but in the end it was worth it.

After a quick rummage through the bits box I started building up the base tile. I have a very specific inspiration for this hive...

I think I'm on the right track.

Cheers.

CJ

Wednesday, February 22, 2017

Terrain: Chimera Bunker 001

This is a terrain piece that GW still sold when I got into 40k. This, the Jungle Trees, and the Gothic Ruins were pretty much it back then, not counting all the FW goodies. I came across it on eBay a short while ago and decided that I couldn't pass it up. I've always thought it a characterful piece. The guys in the Design Studio did a great job using bits to add flavor to the scene. I can see my Imperial Command fitting in this bunker.

Of course, I can be counted on not to leave well enough alone.

The first thing I did was use a lighter and carefully burnt away the static grass.

Next I got out my trench segments and marked out a good spot for them to intersect the bunker. Using my razor saw and stencil knife I carefully cut away a bit of the foam detail and set it aside.

Next I cut a base out and marked the bunker entrance. I used my drill to bore the holes for the bamboo skewers that will secure the foam bunker to the MDF base. Tacky glue holds the foam to the MDF while the skewers are held in foam with the wood glue. I beveled the edge of the base with my stencil knife.

With the foam Chimera Bunker securely fastened to the MDF base I built up the new entrance with styrene H bar and coffee stirrers. The transition ramp is black plastic canvas, textured plasticard, and of course grit. I used spackle to blend the bunker to the base and cover up the remnants of the static grass. Once the spackle set I gave it a coat of grit. I also added a bit of barbed wire at the 'low' side of the bunker.

One of the things I considered when this piece first arrived was to cut off all the sandbags and replace em with smaller ones. That way all the sandbags on my board at any one time would match. Then I decided that maybe there's a Pioneer Corps detachment wandering around with some indentured Ogryns who can easily pack sandbags that size... It sounds like a fun project to take on some day.

Anyhow, all that is left to get this piece finished is painting. Stay tuned.

Cheers,

CJ