Wednesday, March 25, 2015

Orks: Deffkoptas 002

Not much happening on my work bench these last few days. I've spent them mostly helping a friend of mine get his stuff packed up for a move out of state.

Snow-monster
Deacon
One of the consequences of him moving out of town is he needs to board his cat here. This is great since now my cat Snow has a fuzzy playmate.

And in the mean time I did manage to get the bases for the first three Deffkoptas done. Rhinox Hide base over sand and crushed slate, drybrushed with Kommndo Khaki and Bleached Bone. Washed with Agrax Earthshade, repeat drybrushing after painting rocks Codex Grey. Wash again. I added scorched grass to the bases with PVA glue.

Next post should show some paint on the Deffkoptas.

Cheers,

CJ

Tuesday, March 24, 2015

Raging Heroes

Just a quick reminder to everyone that Raging Heroes Dark Elves, Lust Elves, and Sisters of Eternal Mercy goes live in about 19 hours.

Thursday, March 19, 2015

Rolling Thunder!

Steve over at Mad Robot Miniatures has been busy, mates! Here is a preview of MRM's new Gideon MBT!

I am very excited for this piece of equipment to be available to support my infantry elements on the tabletop.

Cheers!

Wednesday, March 18, 2015

Orks: Deffkopta Refurbishment 001


During the summer of 2012 I was working on an Ork force. For whatever reason I wanted lots of Deffkoptas; I had in mind to use something like 20 of the things to use as harriers and general asshats on the flanks... you know, Orky stuff. So I started buying them up on eBay. The core of the army was comprised of AoBR Orks, and they got sold. I've had these Deffkoptas ever since. They are in pretty rough shape, so instead of work on them they went in a drawer. I found em yesterday and decided to refurbish them.

They suffer from the same ailments most eBay fodder suffers: mould lines, broken rotors, broken flight stands, globs of glue. Easily taken care of with a little bit of elbow grease. The other problem the AoBR Deffkoptas present is that they only have rokkits. Codex options are currently twin linked big shoota, twin linked rokkit launcha, or kustom mega blasta.

I used my tube cutter to solve that problem. With lengths of 1/8th and 3/16th inch styrene tube I crafted some shoota barrels. Clipping off a pair of rokkits leaves stumps suitable for attachment of these barrels. And just like that, all the weapon options present in one model.

After reattaching the rotors to the hub with superglue and pins, the model is ready for paint. Now to get the rest up to this point. Well, one down and eight to go.

Cheers,

CJ

Tuesday, March 17, 2015

Happy St. Paddy's!

Go drink some green beer and celebrate.

Hoist one for me.

Cheers!

CJ

Monday, March 16, 2015

Tutorial: Basing and Real Rust


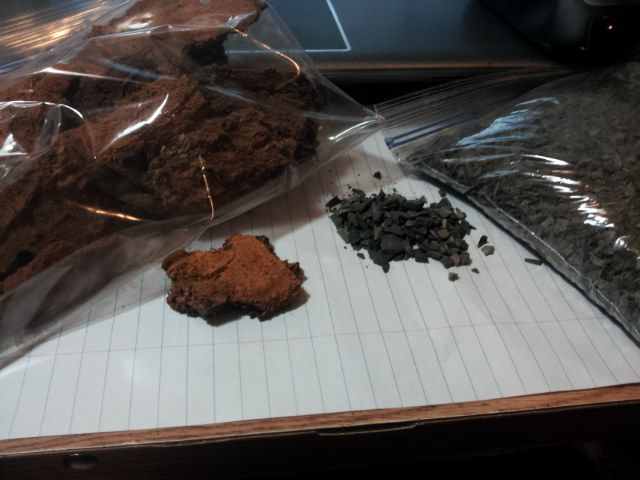
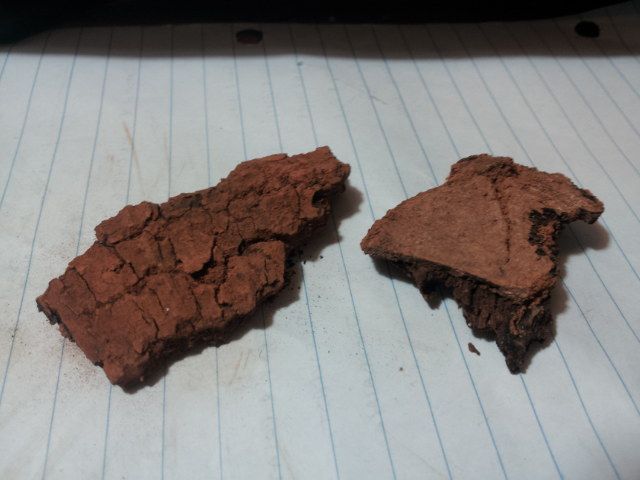
The Girl and I went on a walk today, and our adventure took us to a park with crushed slate walks and an iron heavy river that happens to be running low. Seeing opportunity in the low state of the water, I gathered up some chunks of bark that had nice deposits from the receding waterline. I also took the time to gather some handfuls of crushed slate that had escaped the path proper.

The crushed slate is going to be used to add some variety to my selection of basing materials. I think the rust powder left behind on the pieces of bark will be good for adding rust effects to whatever needs it.

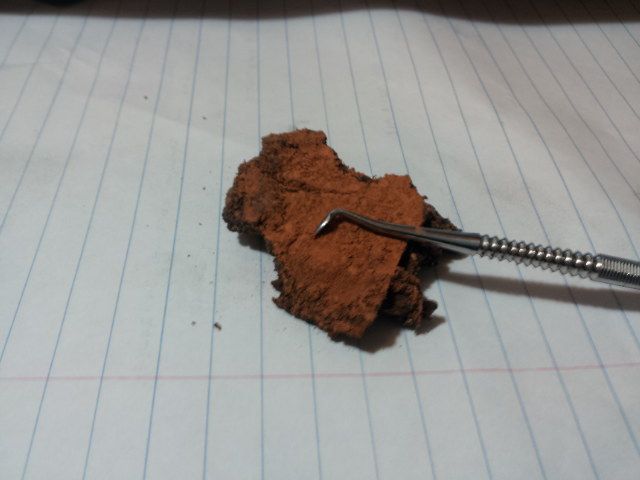
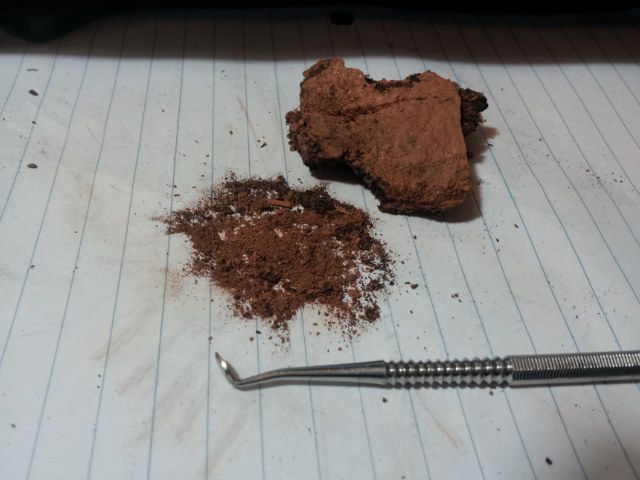
Using a sculpting tool helped get the rust off the bark with out taking off too much of the bark surface with it. The piece I scraped is roughly 1.5" square, and I got a nice little pile for my work. You can see the difference between the scraped bark and the one with rust still there.

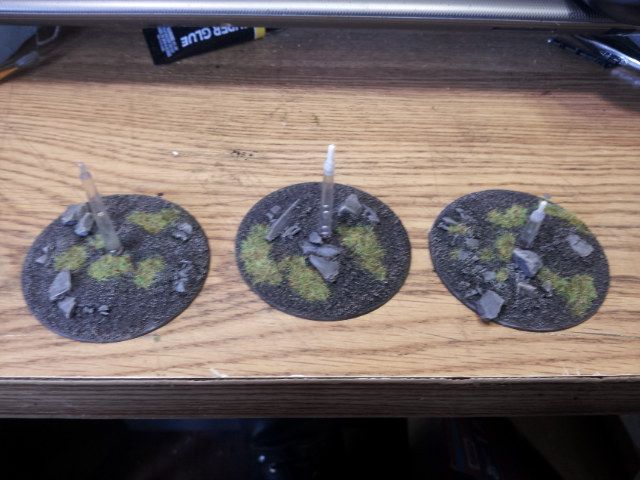
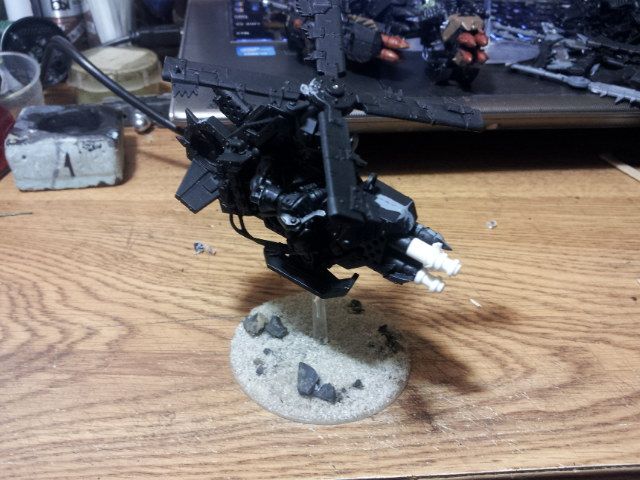
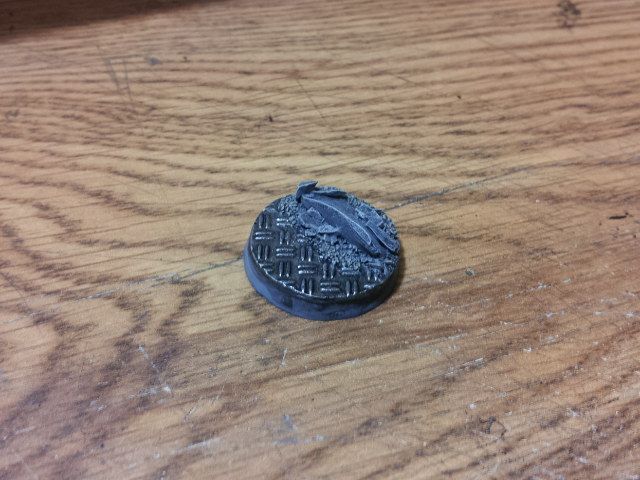
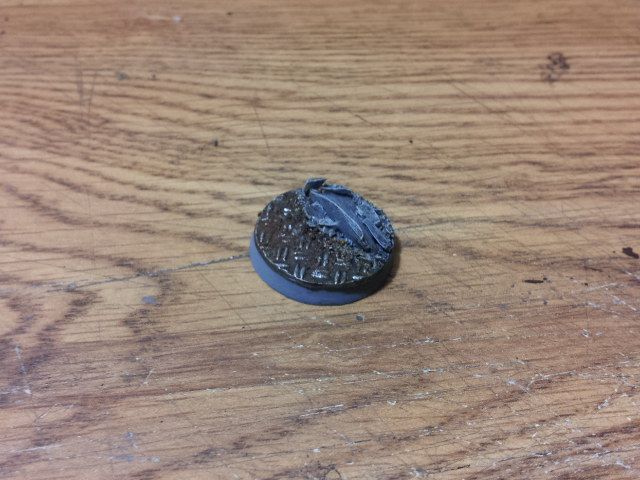
I decided I needed to experiment with this rust powder right away, so I fished out one of my miscast industrial bases. I added some sand and crushed slate, then painted it up.

Then I added some of the rust powder. I used some acrylic floor wax (Future) to fix it in place, and while it was still wet I added a bit more powder. After the Future dried the powder was pretty much set. I pained the raised bits of the diamond plating and washed all the metal with custom rust colored wash. The outcome is pretty nice over all. I think it will take a couple tries to get process down. I have a few of these miscast bases; the product of a rushed mould. I'll kick out a few more and get it all worked out.

Stay tuned. Until then, cheers.

CJ

Sunday, March 8, 2015

Terrain: Imperial Excavator 002

Deconstruction continued on the Tonka toy for an hour or so, while I took out screws and recovered archeotech from the beast. Here is what I ended up with...

There were four electric motors to govern the function of the drive, boom, and bucket; not to mention all the gears to transfer the momentum. A side effect of gutting this thing is a couple pieces that look sort of like things one might find in a derelict factory. I plan to use 'em in future projects.

Using thin card I added some ironwork to the boom and stick. I also used a tp roll to cover the gap a the base of the boom where the worky bits of the toy fit. Straight pins have been used as rivets.


I used clippers to tear through the hull of the excavator and it left a pretty wicked gash. The socket the boom fits into was full of wires and worky parts which ran the toy. As previously stated I gutted the monster and then reformed the socket with more thin card and the rest of the tp roll. This is the base layer for the detail I plan to add to make the excavator look more 'Imperial'.


The last photos here shows the scale of this thing pretty well. It's big.

Cheers,

CJ

Saturday, March 7, 2015

Tempestus Scions 004

The second Tempestus Scions platoon command has been finished this week. I ought to have posted this earlier, but got doing other things on the workbench.

Here are the final three members of the command unit. They each have a distinctive hotshot volley guns. They share some characteristics the other TS platoon command section, namely the mask heads and the hazard striping on the power cables to the hotshot lasguns.

All three with camo cloaks. I think this was one of the things I was most nervous about... not so much painting them, but making sure the design didn't look naff after the fact. I think I did alright on it.

Here are both of the command sections together. When the red armoured Scions aren't acting as Henchmen, I can use them in my IG force.

And so with that unit complete, my Inquisitorial allies are done except for the bases. I think I'm going to be taking the Henchmen off the industrial bases and put them on rubble bases like the rest of my IG force. I might even do the same for my Space Marines. I'm still thinking about that one.

Finally today, I've got some things listed on eBay. Right now my auctions consist of an Eldar lot and a 4th edition 40k dice tin. Take a look if you please, and if you know anyone looking for this stuff let them know :D
/shameless self plug

Cheers,

CJ

Wednesday, March 4, 2015

Terrain: Imperial Excavator 001


I found this guy at the thrift store a couple weeks ago. I love hitting up thrift shops and the like for everything, not just terrain fodder. This electric excavator was free since it is missing a track. It sat in my living room, menacing my cat and taking up space for no good reason except I was pondering whether or not to tear off the boom and stick or leave it on.

I opted for off. It was a pain in the ass, and it took longer than I expected. As I sat there, swearing under my breath and watching Sword Art Online with The Girl, I wondered why this thing was such a bastard to get apart.

...

Turns out the reason is emblazoned right there on the boom. I really ought to have known better in hind sight, since I had about every damn metal Tonka truck there was for my sandbox. The only one that I ever ever broke was the excavator that I left out one winter by mistake. That thing rusted solid at the pin.


Eventually it came off.

Stay tuned for further updates on the Imperial Excavator. Ever seen a gothic excavator? Me either. but I'm gonna try an' church it up a bit.

Cheers,

CJ